This time I would like to demonstrate my technique for dodging and burning when I retouch a photo. Typically I will come to this part of the retouching after removing blemishes etc.
To dodge & burn you can of course use the dodge & burn tools within photoshop and even when you click “protect tones” generally it will be a destructive way to edit the photo and the tones will change eventually.
To be able to dodge & burn in a non-destructive way makes fixing mistakes really easy. Also it becomes possible to adjust the opacity of the dodge & burn and you can apply a layer mask to it to mask out parts of the editing. I do this by making two different passes with two partial different ways to do the doge & burning.
First pass
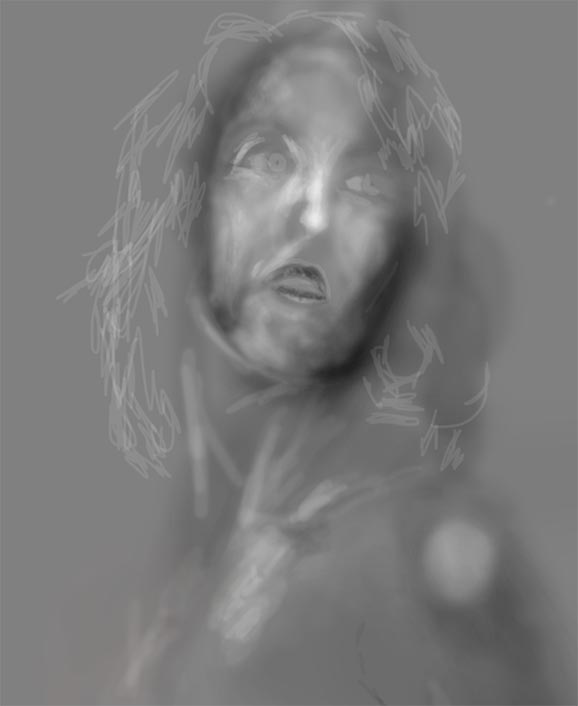
I add a new layer on top of whatever layers you already have when you come to this point of the retouch and I fill this layer with 50% gray and set the layer style to “soft light”.
 Then set the brush tool to white for dodging or set to black for burning. Make sure you set the flow to around 05 (or use a pressure sensitive tablet) so that the dodging and burning is really subtle. Don’t worry if the effect is not enough, you can easily add more of the effect by making multiple strokes over the same area.
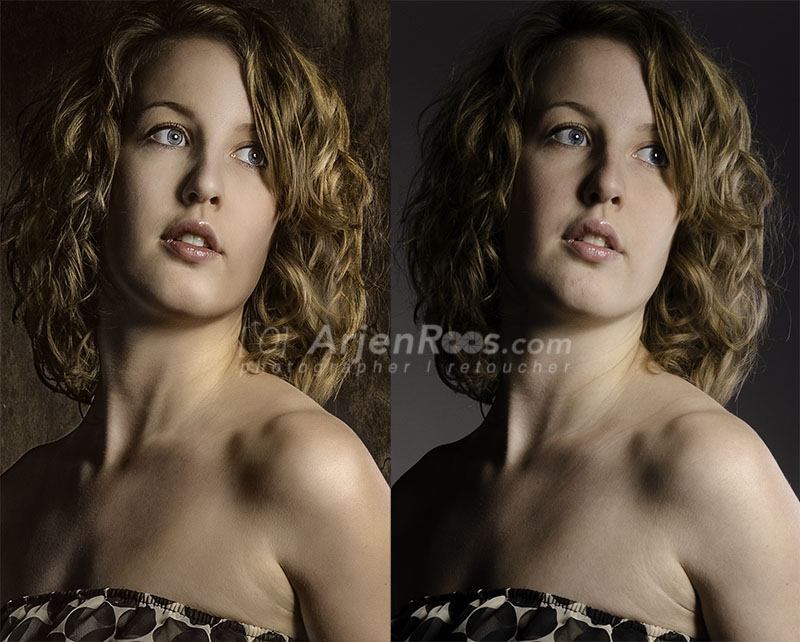
As you can see in the befor/after shot I moved the place the light hit the face of the model using this first pass.
Take your time doing this and don’t forget to walk away from the retouch for a few minutes (a few times) to make sure your eyes don’t adjust to the image to much.
Second pass
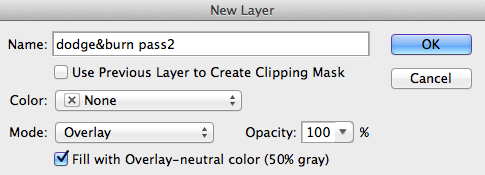
Above the first pass layer we add a new layer also filled with 50% gray, but this layer style is set to “overlay”
 Now this time around I use the photoshop tools for Dodge and Burn. With the exposure of the dodge tool set to around 5 and the exposure for the burn tool set a little higher around 8 I fine-tune the dodge and burn to add highlights in the hair, eyes and so on. I also use this layer to make small color adjustments by using the eyedropper tool to select the right color and with a brush on very low opacity paint some of this color on the image. In this example I used this to add a little bit more color to the hair of the model.
The second pass I use for fine-tuning the whole dodging and burning effect.

With tis technique for dodging and burning it’s really easy to fix mistakes. Just change the blend mode to “normal” and paint the mistake in with 50% gray to fix the mistake. Or you can use a layer mask of course to mask out parts of the layer.
If the effect is to hard you can dial it down a bit by lowering the opacity.